As some of you might know, we tackled a major home renovation last year, and let me tell you – door framing became our weekend obsession!
There’s something incredibly satisfying about creating the perfect entryway to a room. Whether you’re renovating or building from scratch, understanding the basics of how to properly set up your door opening can save you tons of headaches down the road.
We’ve learned so many tricks along the way, and I’m super excited to share them with you today! Ready to transform your home one doorway at a time? Let’s jump right into our complete guide on mastering this essential carpentry skill!
What Is Door Framing?
Door framing is basically creating the skeleton that will support your entryway – think of it as the backbone of any passage in your home. It involves constructing the structural components around an opening where you want to install a new barrier. You might be surprised how much engineering goes into something we use every day without thinking!
The basic components include the jack studs (which run vertically along the sides), the header (which spans across the top), and sometimes cripple studs above the header. When we first started our DIY journey, we totally underestimated how technical this process could get! But trust me, once you understand the fundamentals of this construction technique, you’ll look at every entryway in your house with newfound appreciation.
Watch This: The Ultimate Video On Door Headers
We found this awesome tutorial that completely changed our door framing game! Check it out for a super detailed breakdown of how to properly size and install headers. We’ve watched it like five times and pick up something new each viewing!
Understanding Door Rough Openings
The rough opening is basically the hole in your wall where your entry point will eventually live – and it needs to be bigger than your actual hardware! We learned this the hard way when we bought a standard pre-hung unit for our bathroom remodel. The width was totally off, and we had to redo the whole thing. Not fun!
When planning your framing project, you’ll typically want to add about 2-3 inches to both the height and width of your entry. This extra space allows for the jamb, shims for leveling, and that all-important wiggle room to make sure everything fits perfectly. Remember that old carpenter saying: “measure twice, cut once”? Well, when it comes to rough openings, it’s more like “measure five times, then double-check everything again!” We’ve saved so much money by getting this right the first time.

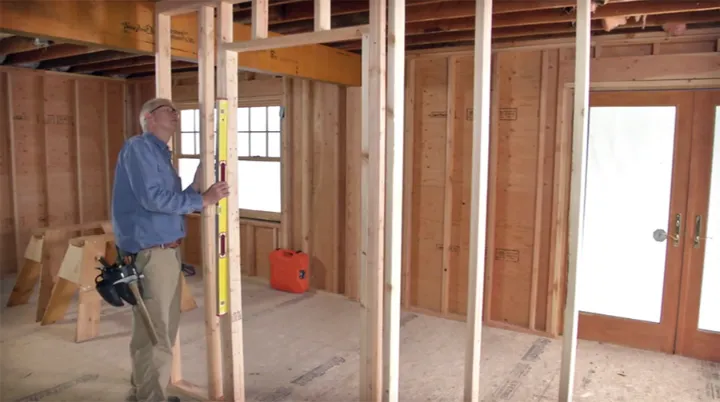
How Professionals Frame a Door Step-by-Step
The pros make this carpentry task look so easy, don’t they? Here’s a quick breakdown of their process that we’ve adopted:
- Start by measuring and marking your rough opening dimensions on the floor and ceiling
- Install the king studs (these run from floor to ceiling)
- Attach the jack studs to the king studs
- Cut and position your header across the top
- Make sure everything is perfectly plumb using a level
- Add any cripple studs above the header as needed
One thing we didn’t realize at first is how important it is to nail everything properly during the installation process. The pros use specific patterns to make sure the structure can handle the weight and movement of an opening barrier. Remember, this construction isn’t just about looks – it’s about creating a solid framework that will last for decades!
Final Thoughts & Contact Us!
And there you have it! The complete lowdown on door framing from someone who’s been through the DIY trenches. Remember that proper preparation prevents poor performance – especially when it comes to creating passages in your home. We hope this guide gives you the confidence to tackle your next project with enthusiasm!

FAQ
What's the first step for a new interior entryway installation?
Before you’re going to assemble anything, you’ll need to know the measurements of the pre-hung unit you want to install. We’ll assume it is a standard x 80 inches. Learn how to properly create the opening; you’ll need lumber. Don’t nail anything permanently yet.
How do I determine the rough opening size for an entryway?
To ensure the entryway will fit, add 2 inches to the width and 2.5 inches to the height of the unit. An associate can assist. This extra space allows for adjustments, ensuring it is flush, and the hinge side can make the installation easy.
What lumber is needed for the entryway structure in a basement?
You’ll need standard building lumber. The header size depends on whether it’s load-bearing. Include a top plate, a sole plate (or bottom plate), and trimmers. Consider using lightweight material for a non-load-bearing partition, maximum allowable is key.
How do I secure the entryway structure when I need to build?
Attach the bottom plate to the floor, use plywood shims. Knowing how to accurately assemble the structure is very special. Ensure you are going to create the structure for the entryway side appropriately. Ensure it is securely in to avoid problems.
Are rough openings for exterior entryways different?
Exterior entryways might need to accommodate a vent or have different clearance needs. Always check building codes. The overall process is similar: measure, add extra inches to the width and height, and use appropriate, sturdy lumber.